How to Send Photos to Clients Without Losing Quality
Clients want to see your photos in the best possible quality—high-resolution, sharp, and with vibrant colors. However, sending large files can sometimes be a challenge, leading to compression that ruins the quality of the photo. That’s why photographers need to think carefully about how they share photos with clients.
)
What We’ll Cover
In this Picflow guide, we explore different methods for sharing photos with clients without compromising quality so that your customers can enjoy the highest-quality photos.
Why Is It Important to Send High-Quality Photos to Clients?
Build Brand and Credibility
A photographer's brand is more or less tied to the ways people view their work. If the method you use to send photos to clients leads to a decrease in quality, your brand is what bears the consequences (even if it isn’t your fault).
Choosing a method that ensures a photo’s quality is essential to building and maintaining your brand as well as your credibility.
Earn More Sales
In addition to building your brand, sending quality photos increases the chances of making more sales. If clients can’t see what you offer in its full glory, then they’re less likely to buy—it really is that simple!
Win Repeat Business
In e-commerce, 41% of all revenue generated by a store comes from returning customers. While we don't have statistics for photographers specifically, anecdotally, we can confidently say that repeat clients are the lifeblood of many photography businesses.
Quality images help to create a positive impression that leads customers back for more in the future.
How to Send High-Quality Photos to Clients (5 Methods)
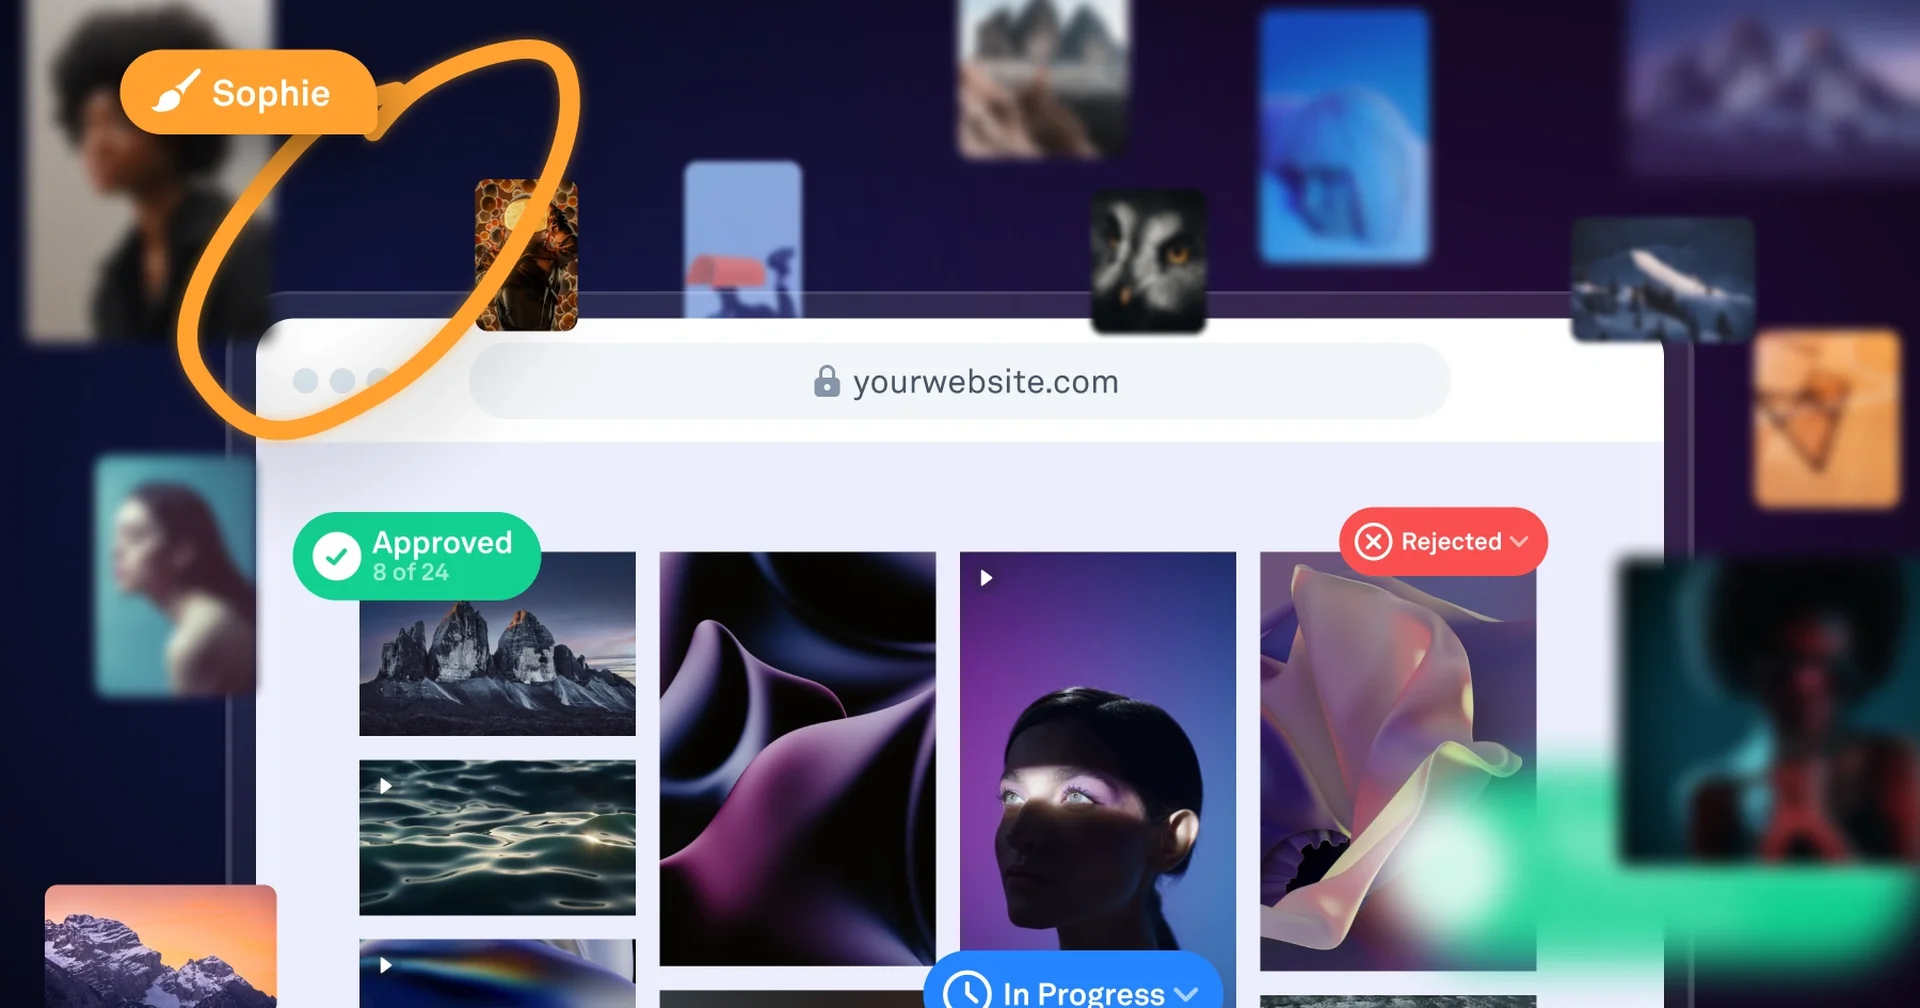
Method 1. Client Galleries
Online client galleries provide secure storage and high-resolution photo sharing. For example, the Hamilton Cuisine Gallery on Picflow showcases 20+ images and videos in a customizable, responsive layout tailored to the brand.

Step 1: Set Up Your Client Gallery
Create a client gallery on your chosen platform (e.g., Picflow). Ensure it is customized with your branding, such as your logo, color scheme, and layout, to provide a professional touch.
Step 2: Upload Your Images
Upload your photos to the gallery in their original resolution or RAW format, depending on the platform's capabilities. This guarantees no loss of quality.
Step 3: Organize the Gallery
Categorize your photos into albums or sections within the gallery for easy navigation. This is especially important for clients who may need to review multiple images.
Step 4: Share the Gallery Link
After the upload is complete, send your client a secure, password-protected link to the gallery, ensuring they can access it from any device.
If you’re looking to organize and deliver your images seamlessly, check out our guide to the best photo management software.
Step 5: Enable Download Options
Allow clients to download images in their original quality or choose from other formats and sizes if needed. With Picflow, unthrottled downloads ensure that the images remain intact.
Step 6: Get Feedback and Proofing
Use the gallery’s built-in annotation and commenting tools to collaborate with the client. Clients can leave feedback directly on images, making the process smooth and professional.
Method 2. Cloud Storage
Cloud storage solutions allow you to store and share high-quality photos via secure links. While not as customizable as client galleries, cloud storage is a convenient and effective option on how to send photos to clients without losing quality.
Step 1: Select Your Cloud Storage Platform
Choose a reliable cloud storage tool such as Google Drive, Dropbox, or OneDrive. These platforms usually offer a free tier with limited storage and premium plans for more space.
Step 2: Upload Your Photos
Upload your photos in their original format (RAW, TIFF, PNG) to your cloud storage folder. This ensures that the images are not compressed.
Step 3: Organize Your Files
Arrange your images into folders, making them easy to navigate. You can also create separate folders for different sessions or categories of images.
Step 4: Share a Secure Link
Set the correct permissions for the folder (e.g., view-only access) and send a link to the client. Ensure they have the required access level and, if needed, a password for added security.
Step 5: Manage Access & Downloads
Monitor who has accessed the files. Clients can download images directly from the cloud, preserving their quality.
Step 6: Ensure Large File Handling
Some cloud storage services offer automatic resizing for large files. Make sure you are sending the original file sizes (rather than compressed versions) when sharing the link.
Method 3. Email (Best for Small Galleries)
While email is quick and convenient, it’s best used for sharing a small number of high-quality images rather than large collections. Here’s how to make the most of it.
Step 1: Compose a New Email
Open your email client and compose a new message to your client. Include a friendly message to explain the images you’re sending and any necessary details.
Step 2: Attach High-Resolution Images
Attach the photos in their highest resolution (TIFF, PNG, or JPEG with minimal compression). Be aware of file size limits imposed by your email provider (typically around 25MB per email).
Step 3: Ensure No Compression
If your email provider supports large attachments (e.g., via cloud integration), ensure that the images remain uncompressed when attached.
Step 4: Send a Follow-Up Link
If your email exceeds the file size limit, include a link to a cloud storage service or a gallery for larger downloads. This ensures clients can still access the images in full quality.
Step 5: Encourage Feedback
Since email doesn’t offer structured collaboration tools, encourage clients to respond directly with feedback. If there are any changes they request, send a follow-up email with updated files.
Method 4. File Transfer Protocol (FTP)
For professional photographers working with very large files, FTP (File Transfer Protocol) is an excellent method for transferring high-quality photos. FTP allows secure, direct transfer of files from one system to another without loss of data.
Step 1: Set Up an FTP Server
If you don’t have an FTP server, you can set one up or use a third-party FTP service. Some hosting providers offer FTP access as part of their service.
Step 2: Prepare Your Photos
Upload your high-resolution photos to the server. Ensure that you organize them into folders to make navigation easier for the client.
Step 3: Generate an FTP Link
Once your files are uploaded, generate a secure link or credentials for the client to access the server. Be sure to include any necessary instructions for logging in and downloading the files.
Step 4: Share the FTP Link with Your Client
Send the FTP login credentials (username and password) along with the link to the client via email or messaging. If your FTP service supports it, set an expiration date for access to added security.
Step 5: Download and Verify
Clients can then use FTP software (like FileZilla) to download the files directly to their system. Verify that the files remain in their original quality after downloading.
Method 5. External Hard Drives or USB Drives
External hard drives and USB drives provide an offline, physical solution for sending high-quality photos. This method is particularly useful for large photo collections and when you want to ensure no loss of data or quality during the transfer.
Step 1: Store Your Files
Transfer the high-resolution photos onto an external hard drive or USB drive. Ensure the files are organized into clearly labeled folders for easy access.
Step 2: Encrypt for Security
If you’re handling sensitive client work, consider encrypting the drive for added security. This ensures that the images are protected in case the drive is lost or stolen.
Step 3: Physically Deliver the Drive
Send the device via mail, courier service, or hand-delivery if possible. Depending on your location and the client’s needs, this can be a reliable option for high-volume transfers.
Step 4: Provide Instructions
If the client is unfamiliar with using external drives, provide simple instructions on how to access and transfer the files from the device to their own storage.
This method is ideal for handling large files, ensuring no quality loss during the transfer. However, it lacks the convenience of instant access and collaboration features offered by online galleries or cloud storage.
Best Practices to Retain High-Quality Photos
Choose Your Methods Carefully
Balancing image quality, client preferences, and convenience is key to happy clients. Email works if you send a couple of images, but other solutions are better for larger galleries and more technical photography work.
Opt for methods that don’t compress images. If you must compress images, make sure you use a lossless compression method (like ZIP or TAR) and explain to clients how they can reverse the process to access the original image.
Capture in RAW Format
If you're shooting in digital format, RAW files are the way to go. They're unprocessed and uncompressed, so they retain the maximum amount of information from the camera. That gives you more to work with in the editing process, leading to higher-quality images overall.
You’ll need to choose a method that supports RAW images to do this. Since these files tend to be big (10–50 MB) email is probably out. Luckily, some client gallery tools (like Picflow) support RAW uploads, and platforms like Dropbox and Google Drive make sending files of any size easy.
Balance Camera Settings
This may be a bit obvious as a photographer, but high-quality photos start with ensuring your camera settings are balanced and optimized. This includes everything from the aperture, ISO, shutter speed, white balance, and more.
Depending on what you’re shooting and the look you’re going for, these elements may differ. Play around with different combinations until you find one that works best for your images. Every camera has quirks, and getting to know your camera specifically will help with quality (even if you’ve been shooting for years).
Edit Carefully
Editing is essential to post-production—it can take photos from good to great (or from great to amazing). But when editing digital images—especially in RAW format—it's important not to overdo it. Too much tweaking can make them look less authentic, so try to stay true to their original colors and composition as much as possible.
It’s relatively easy to edit an unedited image. It’s harder to correct edits to an image that the client ends up disliking. Wait for feedback (and image annotations if you’re using a tool like Picflow), and make sure that the client is completely satisfied before you make any irrevocable changes.
Work Collaboratively
At the end of the day, quality is subjective. Even “imperfections” like blur, pixelation, and distortion can be design assets—although usually when done intentionally. A high-quality photo is one that meets your client’s needs, resonates with the target audience, and reflects your creative vision.
The only way to balance these considerations is with collaboration. That’s why it’s important to choose tools that make collaboration simple.
Picflow’s comment threads, image annotations, flags, and color tags are all simple but effective ways to ensure that everyone is on the same page and can share feedback without confusion or misunderstanding.
Whether it takes several rounds of tweaks or only one, with Picflow’s collaborative tools, you can easily create a photo that exceeds your client’s expectations and meets the needs of any project.
Impress Clients with High-Quality Photos using Picflow
High-quality photos can be the difference between success and failure for a project.
Thanks to Picflow Galleries, you don’t have to worry about quality or compression. We support RAW uploads, 4K video, and beautifully responsive galleries to ensure your photos look their best—no matter where they’re seen.
Plus, with Picflow’s robust sharing and collaboration features, you can easily share your images with clients and team members to get the feedback you need for a successful project. Get started for free and see why Picflow should be your go-to tool for sending high-quality photos.