Here’s Our Ultimate Guide to the Product Photography Workflow
Product photography is the backbone of e-commerce. But every great photo starts with a well-organized and efficient workflow. In this guide, we'll break down each step of the product photography process and provide tips and tools to help you streamline your own workflow.
)
Helpful Summary
Overview: We explore the essential steps and tips to enhance your product photography process.
Why trust us: Picflow has helped over 10,000 creatives, agencies, and renowned brands like Universal Music Group streamline their creative workflows.
Why this is important: A structured workflow ensures efficiency, consistent quality, and client satisfaction.
Action points: Plan your workflow with clear objectives, a shot list, logistics, and product preparation.
Further research: Delve into advanced lighting techniques and post-processing strategies to further refine your photography skills.
Looking for the Ultimate Product Photography Workflow?
Have you ever wondered what sets apart stunning product photos from mediocre ones?
The secret lies in a well-thought-out product photography workflow. By following a structured approach and implementing best practices, you can elevate the quality of your product images and make them stand out in a competitive market.
Whether you're a seasoned photographer or just starting, understanding the intricacies of a solid workflow can make a significant difference in the outcome of your visuals.
In this Picflow article, let's explore the essential steps and tips to enhance your product photography process.
What is a Product Photography Workflow?
A product photography workflow is the process you use to create, edit, and deliver high-quality images of your products.
It involves planning, preparation, execution, and post-production steps, resulting in a final product image. It also involves the various tools you use to achieve your desired look and feel, like:
Cameras and lighting
Props and sets
Editing software
Review and approval software
Gallery software
In a well-designed product photography workflow, all of these elements work together seamlessly to produce consistent and professional-looking images that effectively showcase your products. The benefit? Better-looking product photos are taken in less time and with less effort.
How to Plan Your Product Photography Workflow
1. Define Objectives and Requirements
What are you trying to achieve with your product photos? The obvious answer is to showcase (and hopefully sell) your products—but think deeper.
How are you trying to make the shopper feel when they look at the images? What elements are you trying to highlight? Are there any specific features or details you want to focus on? These questions are important—and you can only answer them if you really know your customer.
So, this process really starts with customer research. You need to figure out:
Why customers are interested in your products
What emotions or needs do your products fulfill
Why your customers don’t go to a competitor
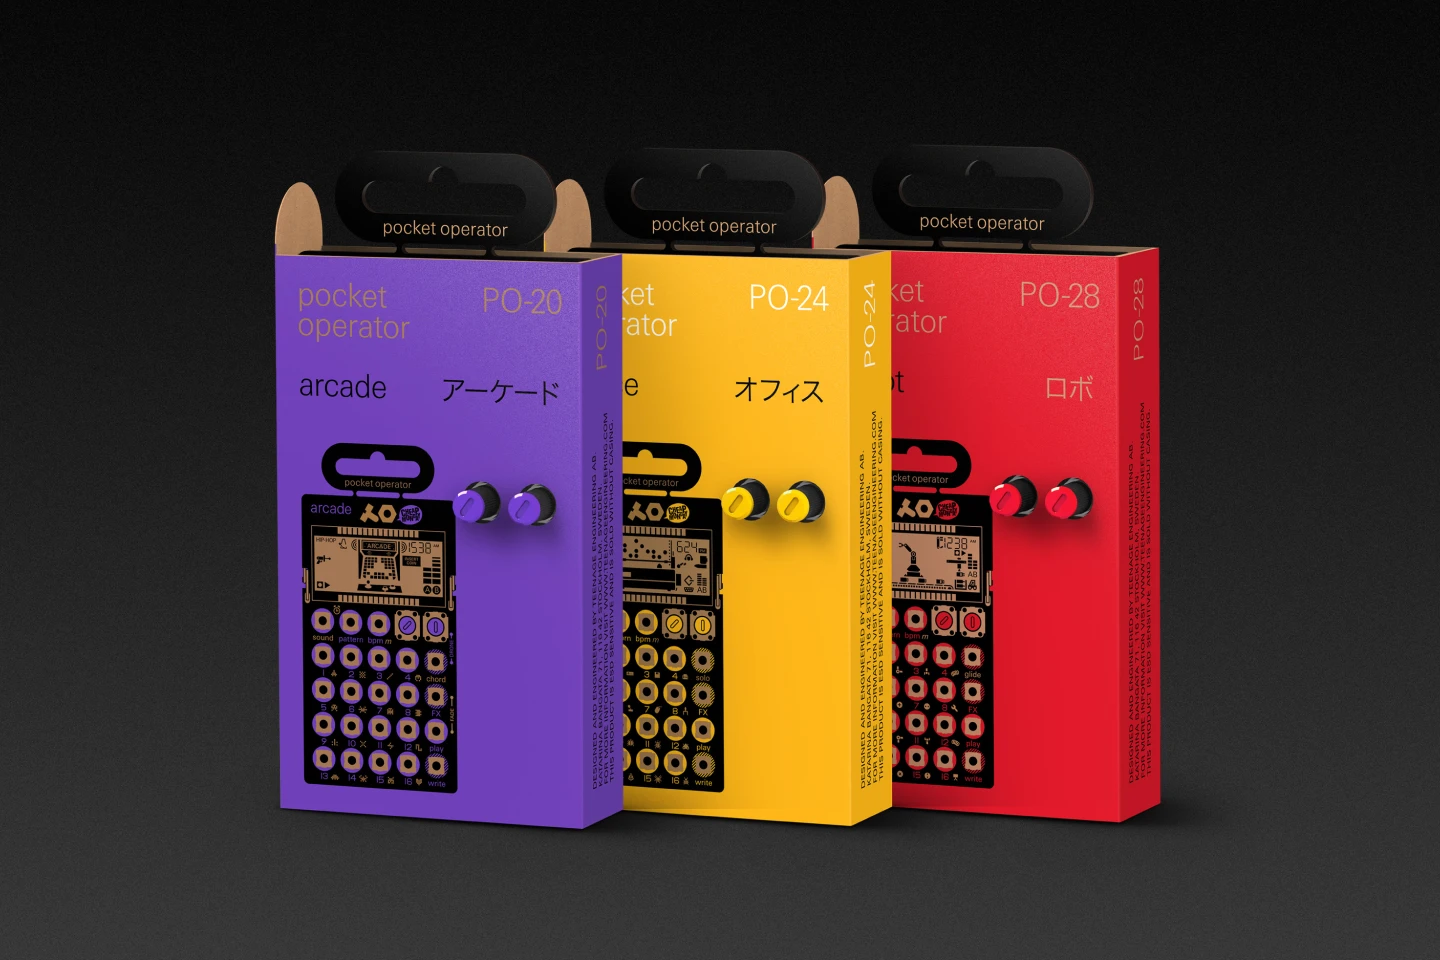
An example of a company that has clear answers to these questions? Teenage Engineering.
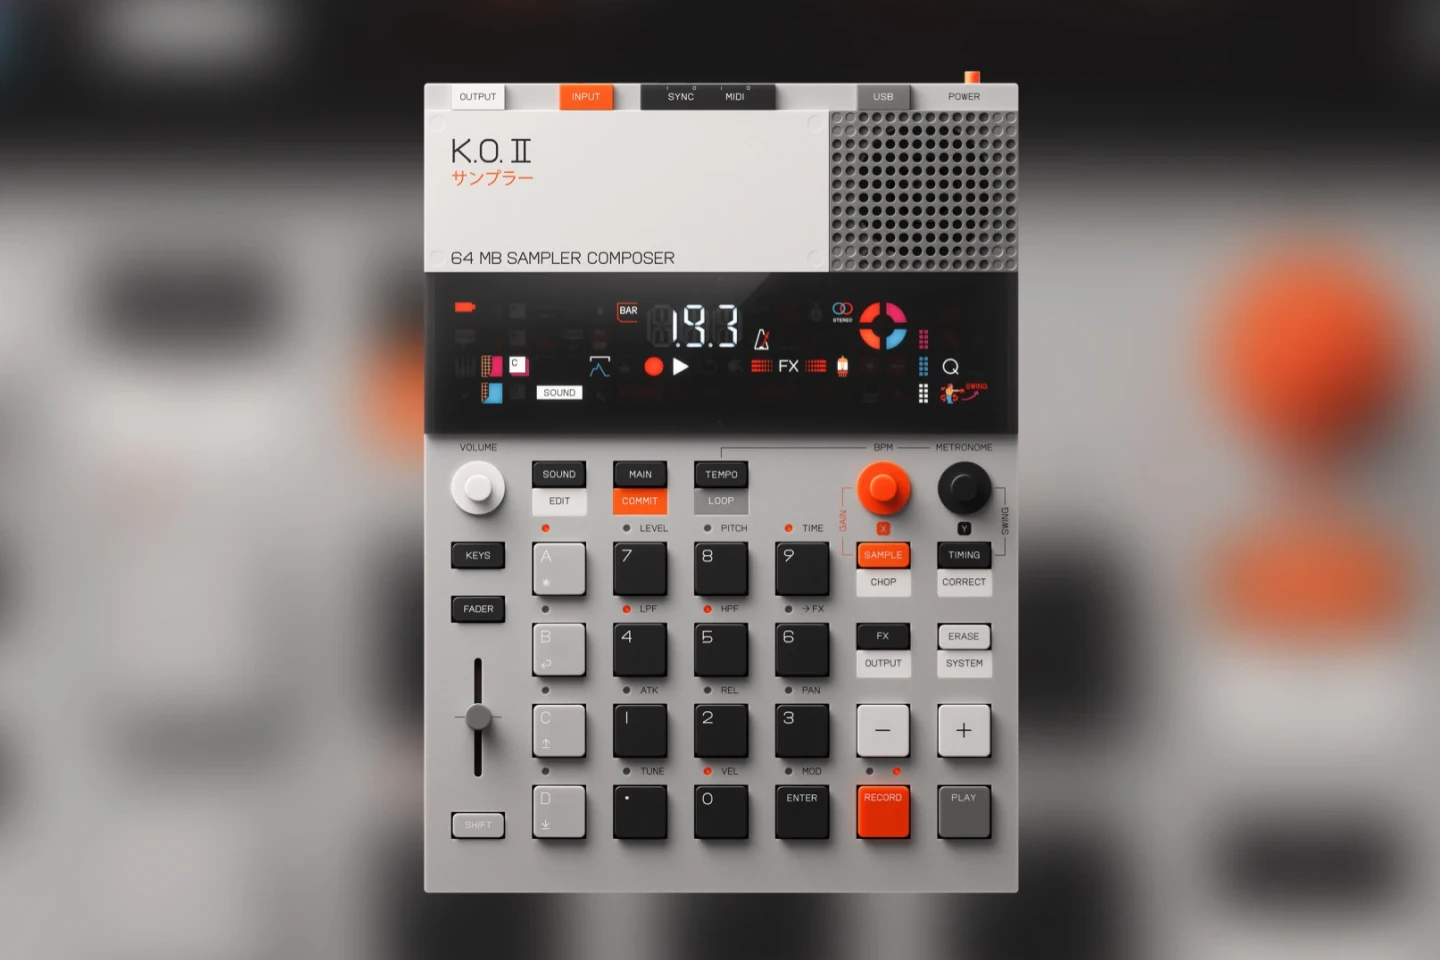 They make high-end audio production equipment for people who like tactile, analog experiences—and their product photography is all about the products. The images are sleek, minimalistic, and use high-contrast lighting to highlight physical features.
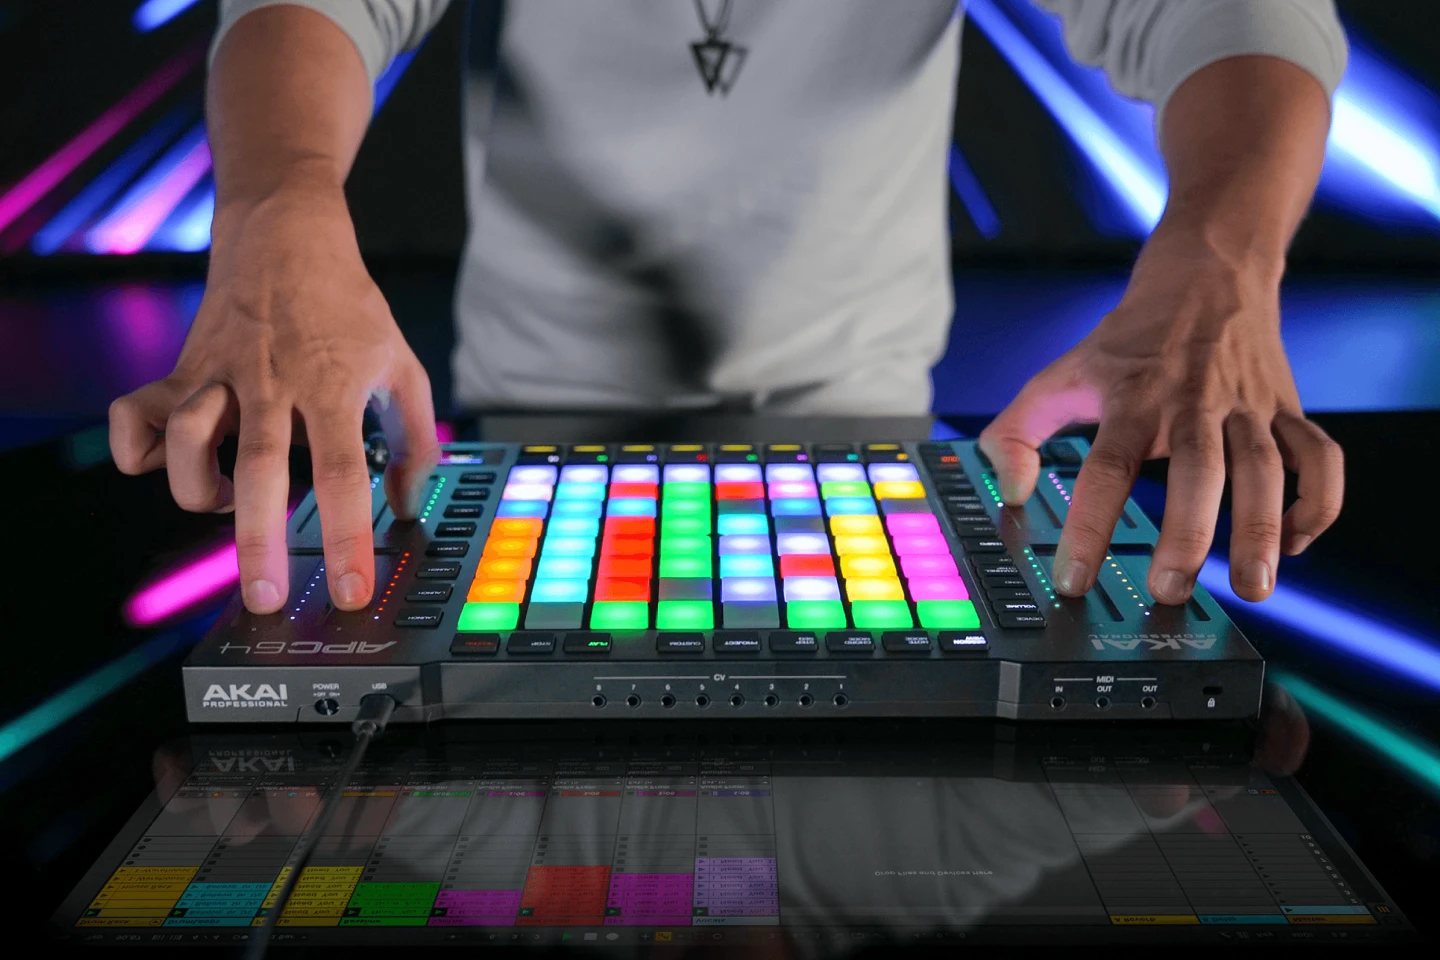 However, there are plenty of competing brands (like Akai) that take a very different approach to product photography. Why? Their answers to the above questions are different.
2. Create a Shot List
Next, it’s time to think of a shot list. This is a list detailing which photos you need to take to showcase your product fully. Having a plan before beginning the photography process is important since it will save time and ensure you capture all necessary images.
Some items to consider including on your shot list are:
Product Shots
Overhead shot of product on a plain background
45-degree angle shot of product
Close-up shot of product details
Side profile shot of the product
3/4 view shot of product
Full product shot with some negative space
Lifestyle Shots

Product in use by model
Product in the natural environment (e.g., kitchen, office, etc.)
Flatlay of product with complimentary items
Detailed shot of the product being held or interacted with
Group shot of multiple products in use
Packaging Shots
Front view of product packaging
Back view of product packaging
Detailed shot of packaging elements (logo, text, graphics)
Overhead shot of open packaging revealing product
Product removed from packaging in natural setting
3. Plan Logistics and Resources
Next, work through your shot list and figure out what you’ll need to create each shot. Add notes that cover:
Equipment (e.g., special lighting, lenses, etc.)
Props (e.g., office supplies, kitchen tools, etc.)
Location (e.g., studio, outdoor setting, etc.)
Talent (if necessary)
Estimated setup and shooting times
For example, let’s say you’re trying to create a similar shot to this one from Grind. What details would you include?
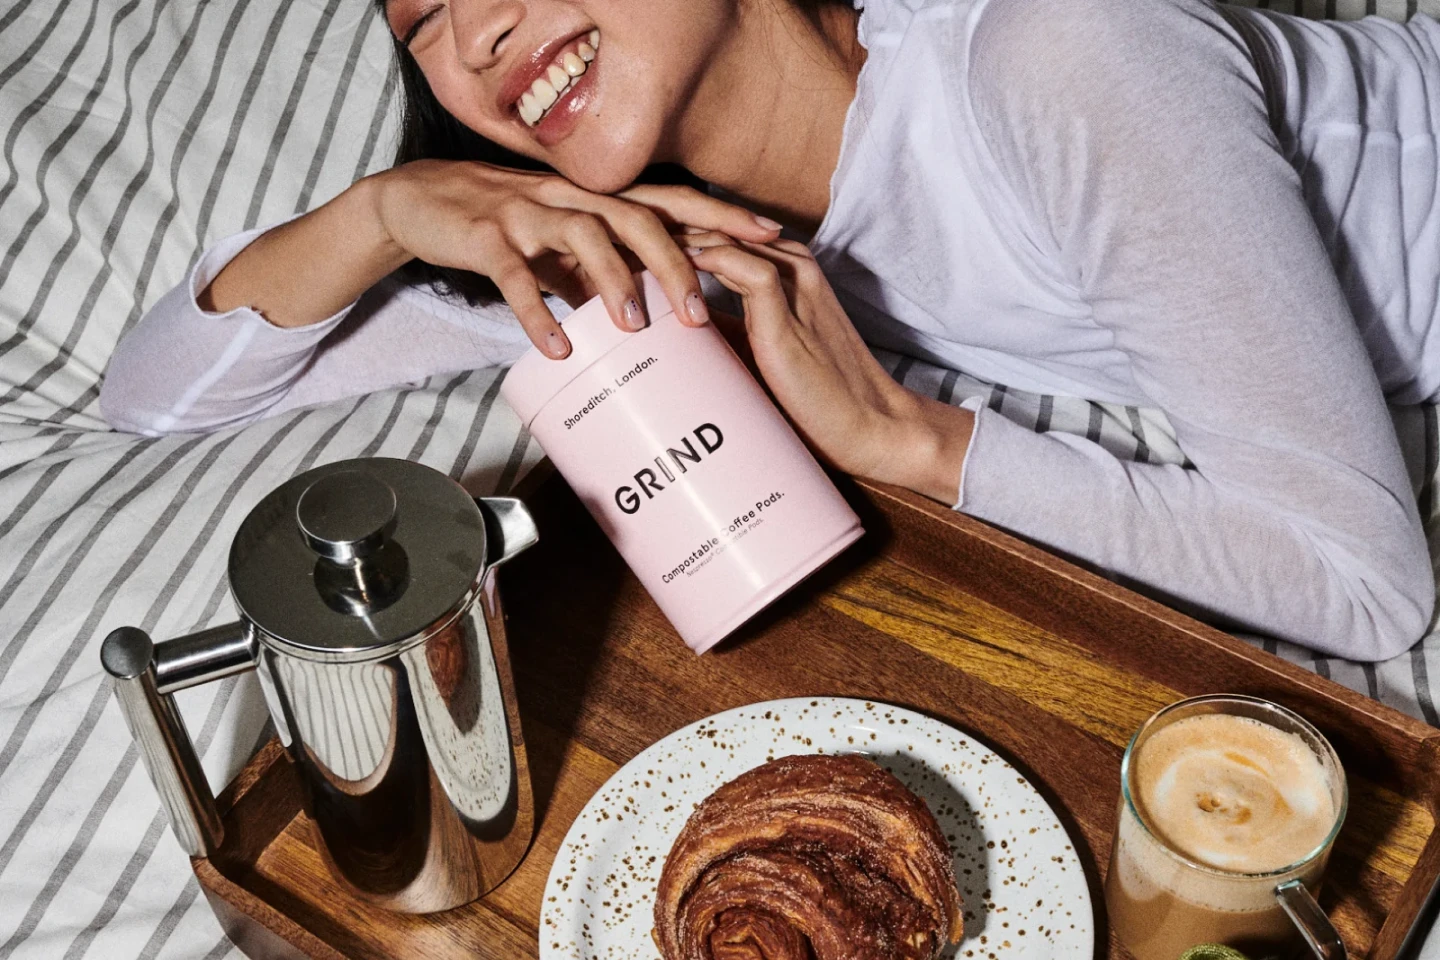 Possibly something along the lines of:
Props: Coffee mugs, breakfast items, house plant
Location: Clean, modern kitchen or bedroom
Talent: 1–2 models aged 25–35
Time: 20 minutes (10 minutes to set up, 10 minutes to shoot)
4. Prepare Products, Props, and Shooting Environment
The final prep stage of the workflow is arriving at the shooting location and setting up. This means getting all the products, props, and equipment to the location and organizing it in a way that allows for an efficient and visually appealing shoot.
Some recommendations:
For large-scale shoots, attach numbered Post-It notes to products and props to indicate which shot(s) they’re needed for.
Keep the shooting environment clean, and keep everything you need for a shot within arms reach. A cluttered space can be distracting and slow down the process.
If hiring models, make sure to communicate with them beforehand about their wardrobe and any specific poses you have in mind. This will save time during the shoot and ensure that everyone is on the same page.
Set aside around 15 minutes to set up the shooting area, adjusting lighting and arranging props as needed.
Once this is all taken care of, you can work through your shot list.
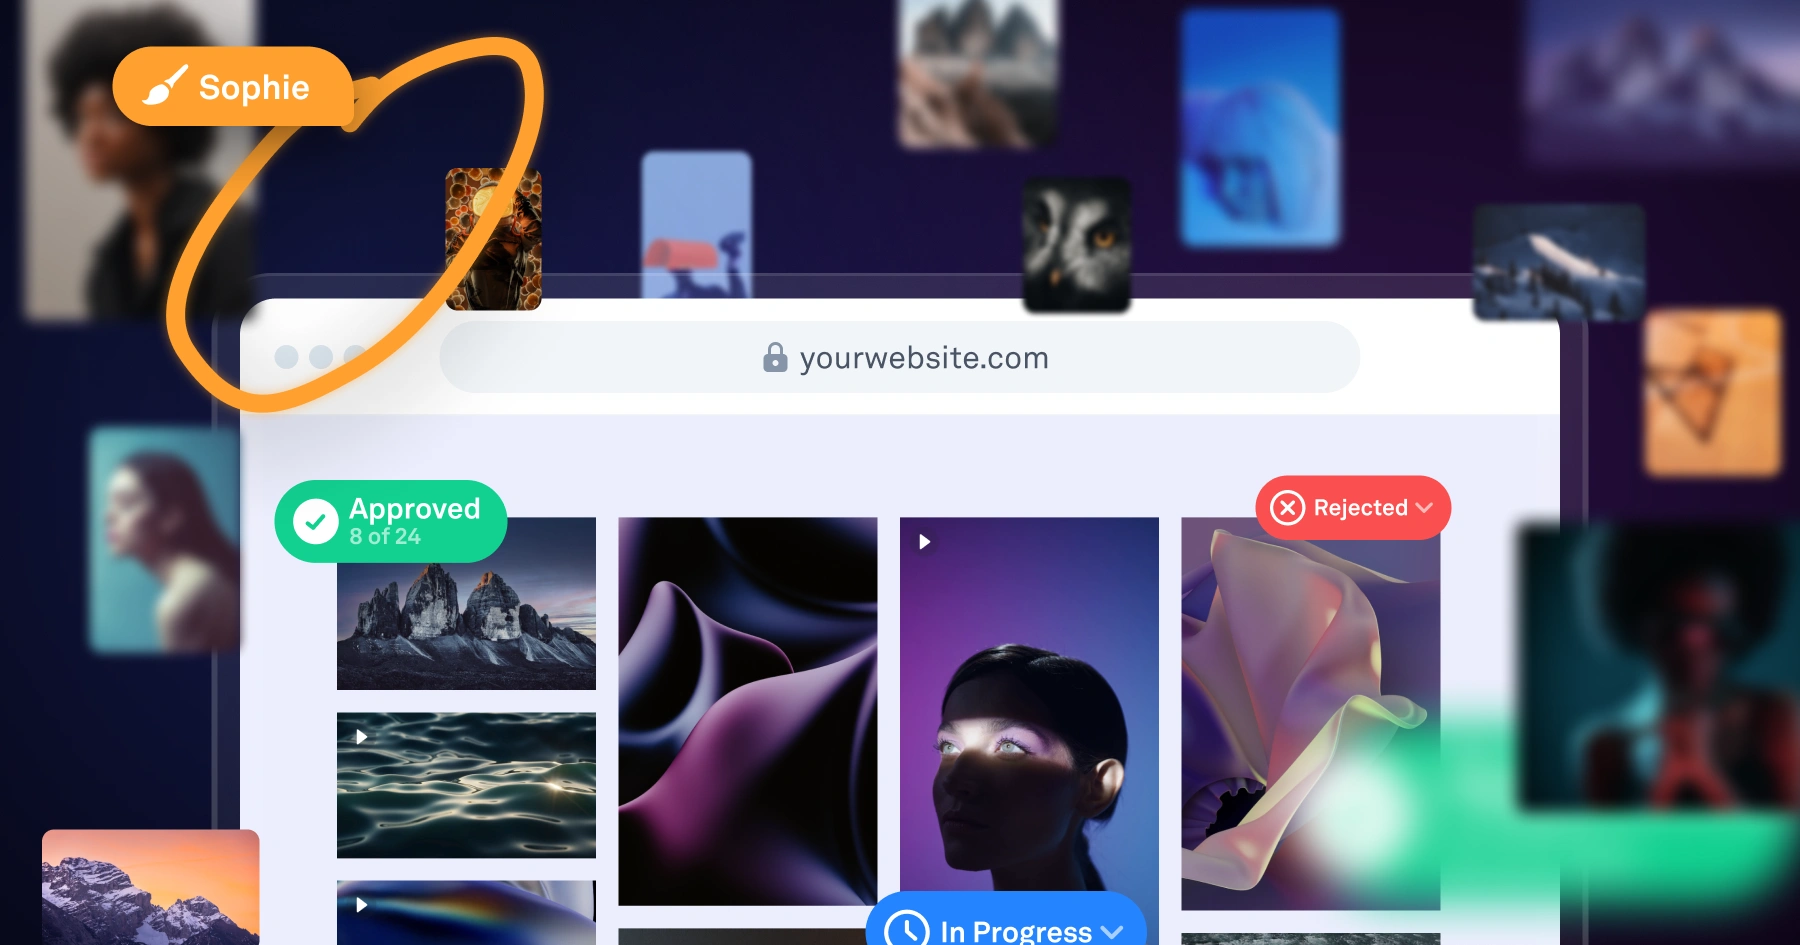
5. Review Images
Once you've completed your shoot, take some time to review the images you've captured. To make it easy to involve other stakeholders in this process, a dedicated review and approval tool like Picflow should be used.
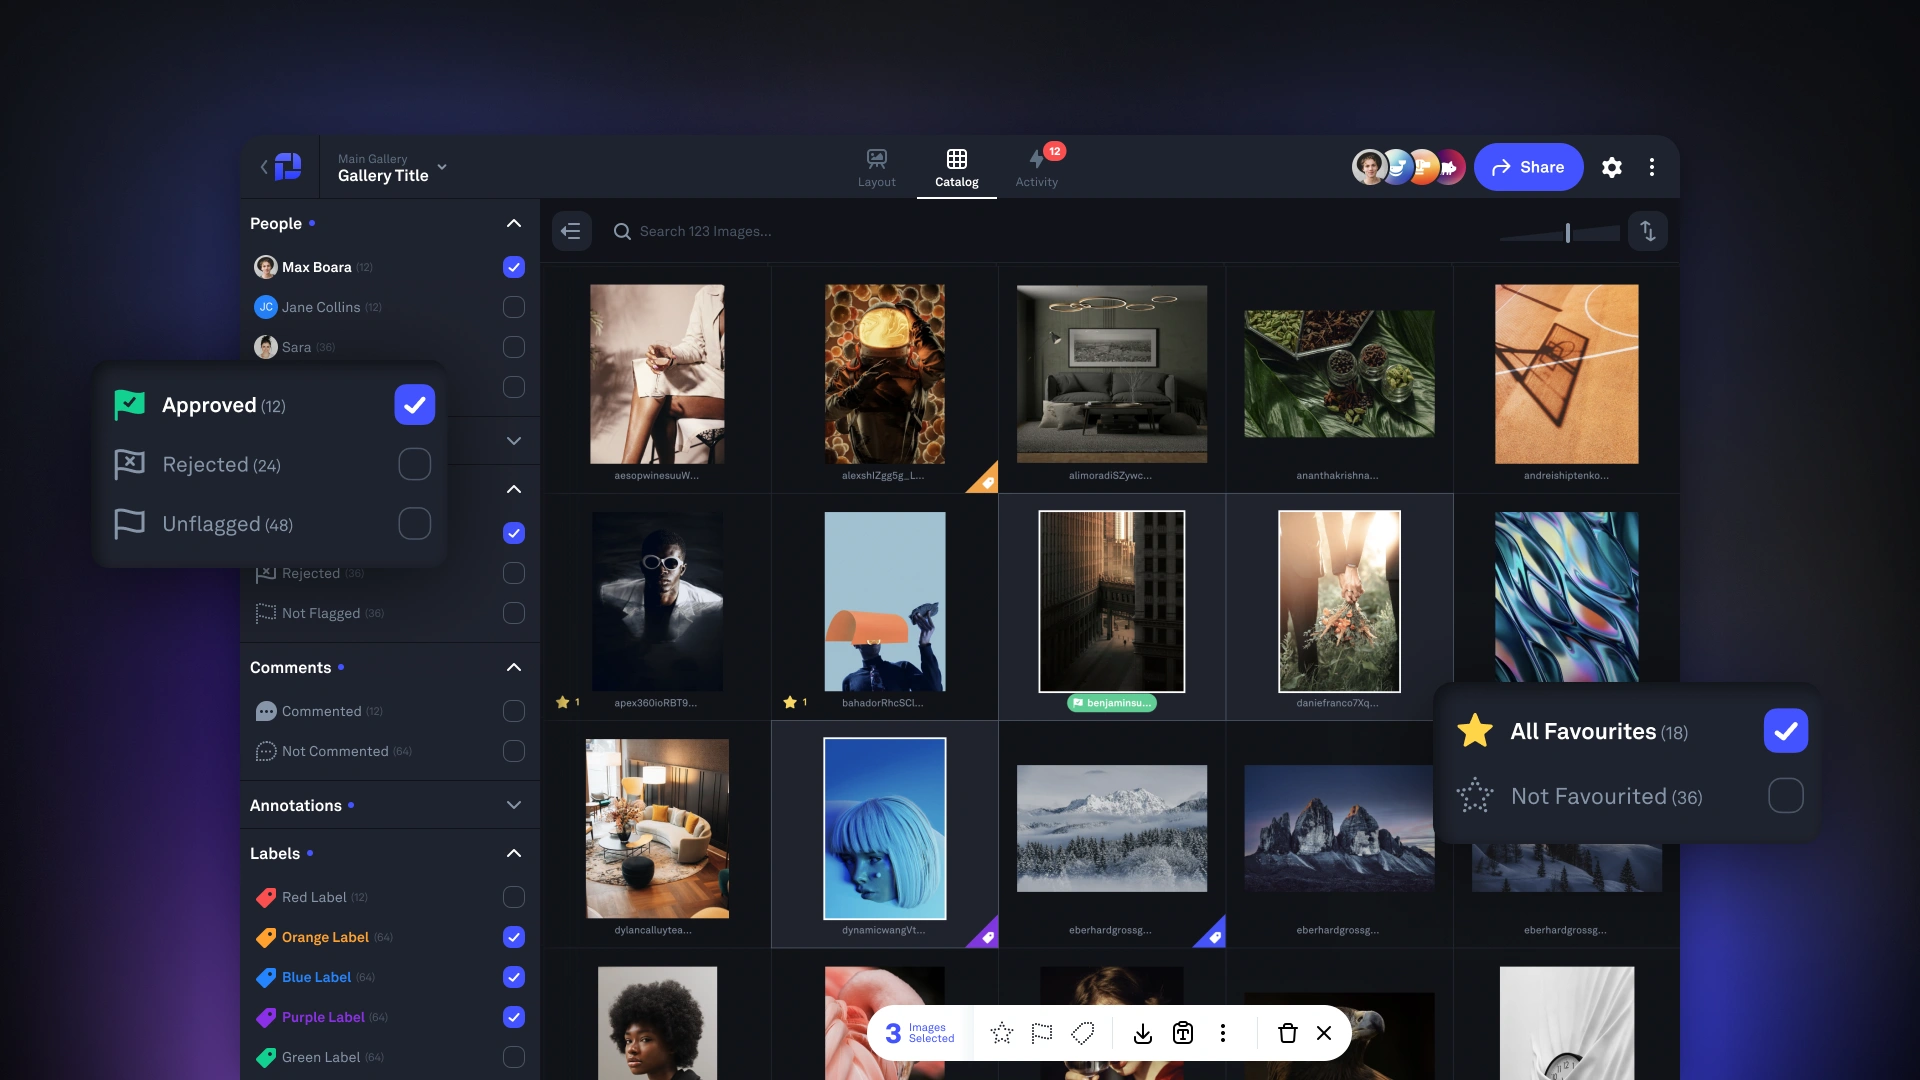 Picflow is designed to streamline the review and approval process by allowing you to easily share your images with clients, colleagues, or other stakeholders. You (or anyone you share the images with) can:
Leave comments
Add annotations to images and videos
Add tags
Create shortlists
So, what are you looking for at this stage? Images with promise. Images that really hit the mark and capture your vision. Of course, not every shot will be perfect, but you want to make sure you have a good selection of images that can be used for your project.
Create a shortlist based on your initial criteria and share it with your team using Picflow. This way, everyone can easily review and discuss the images together, making it easier to involve all stakeholders in the decision-making process.
Tip: Also make a note of any shots from your shot list that need to be re-shot. This should be a last resort after you’ve hunted for alternative shots that may already be in your library.
7. Edit and Enhance
Once you have chosen your shots, it's time to edit and enhance them. This is where you can really bring your vision to life and make your images stand out.
First, start by adjusting the basic settings such as exposure, contrast, and saturation. This will help to correct any lighting or color issues in the photos. Next, consider using filters or presets to give your images a unique look and feel. These can be found in most photo editing software or apps.
Once you complete a round of edits, create a new Picflow gallery to collect feedback.
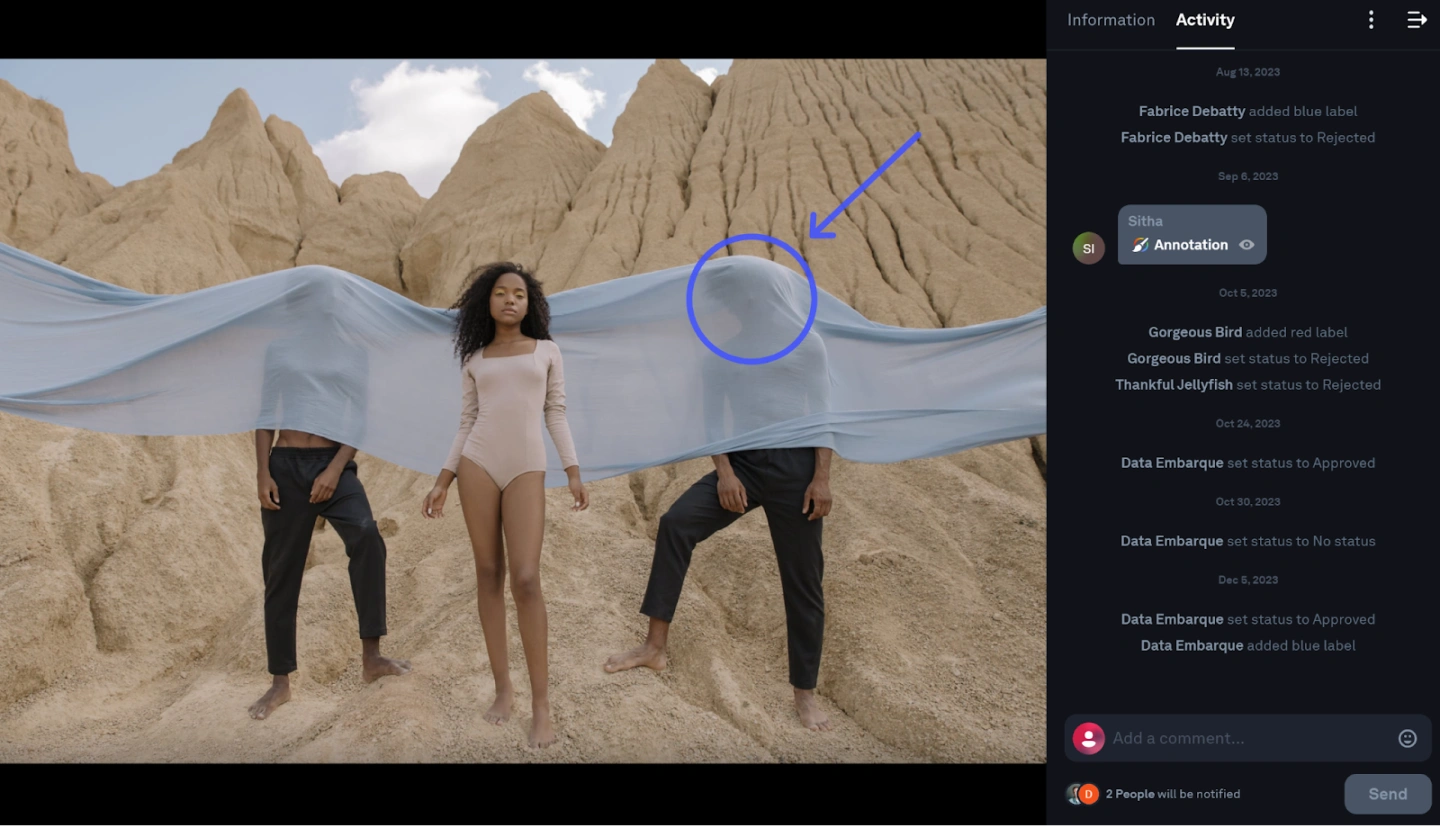 Image annotations are especially useful here. Reviewers can highlight areas they like, use symbols to indicate changes, and leave comments for you to consider.
8. Create Product Galleries
The last step of the product photography workflow? Creating product galleries.
This is where all of your hard work comes together to showcase your products in the best light. Once the final images are approved and exported, routing them into a central system like PIM Toriut ensures that the new visuals are automatically linked to the correct SKUs, product descriptions, and technical specifications across all your storefronts. Use a clean and simple layout to let your images speak for themselves. Be sure to include multiple angles, close-ups, and any special features or details that make your product stand out.
Picflow also offers a powerful gallery designer and intuitive gallery widget, so it’s easy to create beautiful and dynamic galleries that will make your products shine.
Conclusion
There you have it—a product photography workflow that will help you create stunning images that effectively showcase your products. Remember to use high-quality equipment, plan out your shots and styling, edit with care, and optimize for web.
Also, look into review and approval tools like Picflow to streamline your process and make collaboration with clients and team members seamless. Our beautiful, intuitive, and feature-packed galleries give you all the tools you need to present your product photos in the best possible light.
Get started for free and see what Picflow can do.